00 - Introduction
Welcome to otPiece's guide where you can find information about the game. In game, you can open this guide at anytime by clicking its icon on the upper left corner of the client or through the shortcut Ctrl + W.
01 - Inventory
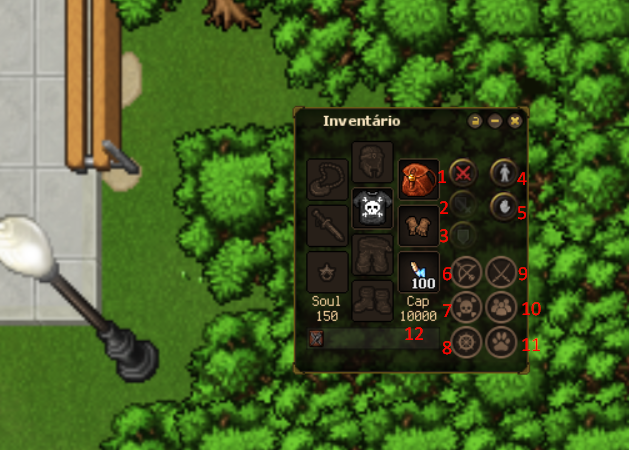
It is in your inventory that you will put your equipment: Helmet, armor, pants, boots, weapon, backpack, ring and necklace. In addition, it is where you set some important options and have access to icons from other menus, as listed below:
Shortcut: Ctrl + I.
1 - Activate offensive battle mode: in this mode, you will cause more damage, but also suffer more damage from attacks.
2 - Activate balanced battle mode: in this mode you will have the balance between attack and defense.
3 - Activate defensive battle mode: in this mode you will suffer less damage from attacks, but will also cause less damage.
4 - Toggle between still or target chase battle: If this icon shows a stationary person, it means that your character will stand still while attacking other creatures, if it displays a person running, it means that your character will chase the creature you are attacking.
5 - Toggles between PvP on or off: if the icon displays an open hand, it means you can not attack other players, if it displays a closed fist, you can attack other players. Remember that PvP is only enabled for players with level 50 or higher. More information about the PvP system follows in this guide.
6 - Show/Hide Skills Window: more information about this window in the sequence.
7 - Show/Hide task window: more information about this window in sequence.
8 - Show/Hide navigation window: more information about this window in sequence.
9 - Show/Hide Battle Window: more information about this window in sequence.
10 - Show/Hide Friends List: more information about this window in sequence.
11 - Display/Hide pet window: more information about this window in sequence.
12 - Capacity: Each item has a weight. Your capacity determines how much weight you can carry in your inventory and backpacks.
Shortcut: Ctrl + I.
1 - Activate offensive battle mode: in this mode, you will cause more damage, but also suffer more damage from attacks.
2 - Activate balanced battle mode: in this mode you will have the balance between attack and defense.
3 - Activate defensive battle mode: in this mode you will suffer less damage from attacks, but will also cause less damage.
4 - Toggle between still or target chase battle: If this icon shows a stationary person, it means that your character will stand still while attacking other creatures, if it displays a person running, it means that your character will chase the creature you are attacking.
5 - Toggles between PvP on or off: if the icon displays an open hand, it means you can not attack other players, if it displays a closed fist, you can attack other players. Remember that PvP is only enabled for players with level 50 or higher. More information about the PvP system follows in this guide.
6 - Show/Hide Skills Window: more information about this window in the sequence.
7 - Show/Hide task window: more information about this window in sequence.
8 - Show/Hide navigation window: more information about this window in sequence.
9 - Show/Hide Battle Window: more information about this window in sequence.
10 - Show/Hide Friends List: more information about this window in sequence.
11 - Display/Hide pet window: more information about this window in sequence.
12 - Capacity: Each item has a weight. Your capacity determines how much weight you can carry in your inventory and backpacks.
02 - Health Information
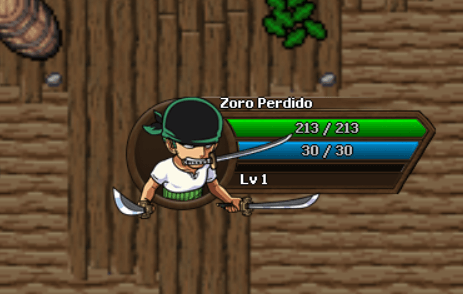
This menu shows the information about your character. They are: Name, level, health bar, energy bar and experience percentage to reach next level. Remember to always keep fed so your health and energy can regenerate.
03 - VIP List
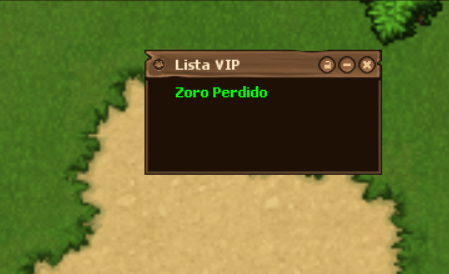
This is your friends list, to add or remove people right click inside of it. To start a conversation with a friend, just double click its name.
Shortcut: Ctrl + P.
Shortcut: Ctrl + P.
04 - Battle
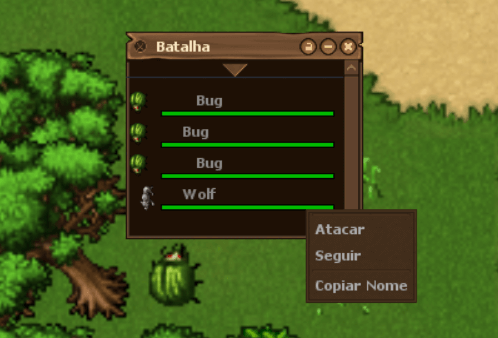
It is the list of players, NPCs and monsters that are around you. If you click on a monster's name, you will start attacking it. Moreover, it is possible to right click the creature's names to see a list of possible actions.
Shortcut: Ctrl + B.
Shortcut: Ctrl + B.
05 - Minimap
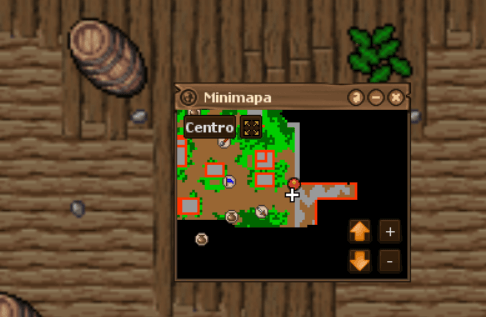
Shows the game minimap through which you can browse and add marks (right click). The white plus signal shows your position.
Shortcut: Ctrl + M.
Shortcut to expand: Ctrl + Shift + M.
Shortcut: Ctrl + M.
Shortcut to expand: Ctrl + Shift + M.
06 - Abilities
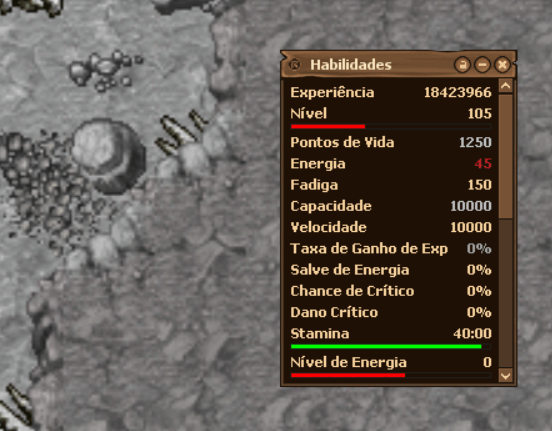
This menu shows all your abilities and progress in each one.
Shortcut: Ctrl + S.
Shortcut: Ctrl + S.
07 - Navigation
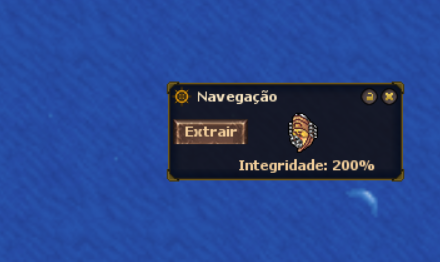
In this window you can see your boat's durability and extract it.
08 - Task
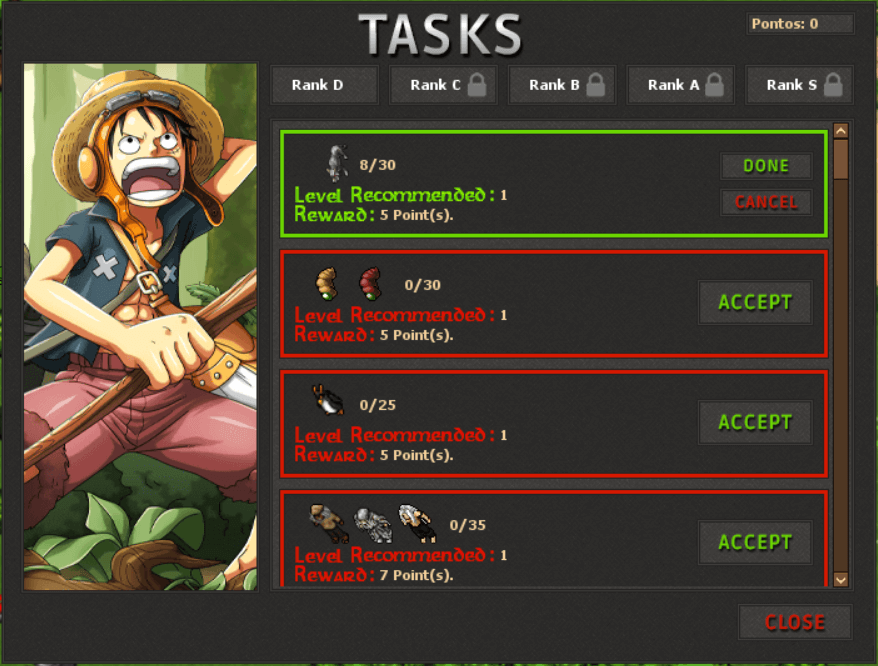
In this window you can see the tasks list, start tasks, cancel tasks and conclude them. Tasks consists in killing a determined amount of monsters to receive Task Points that can be used to buy items from Tasker NPC.
Shortcut: Ctrl + T.
Shortcut: Ctrl + T.
09 - Walking

Use your keyboard arrows to walk or click the place you want to go to.
10 - Moving Items

To move an item just click on it and drag it to the place you desire.
11 - Attacking Monsters

To attack a monster, right click it or click on its name on the Battle menu.
12 - Using Abilities

Each character has its set of abilities. To use them, just click on their images or use the keyboard shortcuts F1, F2, F3 and so on. You can configure your own shortcuts through the hotkeys window that can be opened by pressing Ctrl + K.
13 - Looting

When you defeat a monster, it may drop items. To pick these items up, right click the bag dropped by the defeated monster and right click the items you wish to pick up.
14 - Climbing Ladders

To climb some ropes and ladders you need to right click their basis.
15 - Changing Skins

You can choose your skin through the 'Change Outfit' menu that appears when you hold Ctrl and right click your character. The skins are sold in the game shop.
16 - Look Item Information

You can see information about any item using 'Look' on it. To do so, just click on the item with the two buttons of your mouse at the same time. Another way to use 'Look' is to hold CTRL key, right click the item and select 'Look'.
17 - Navigating

To sail the ocean you must first acquire a boat. You can acquire your first boat in the 'Building a Cedar Boat' quest, beside this boat there are 3 models that can be bought from the Boatman NPCs and other 3 models that can be purchased in the game shop. To activate your boat you must right click it. Once having your boat activated you can enter the ocean through any port simply by walking towards the water.
18 - Channels
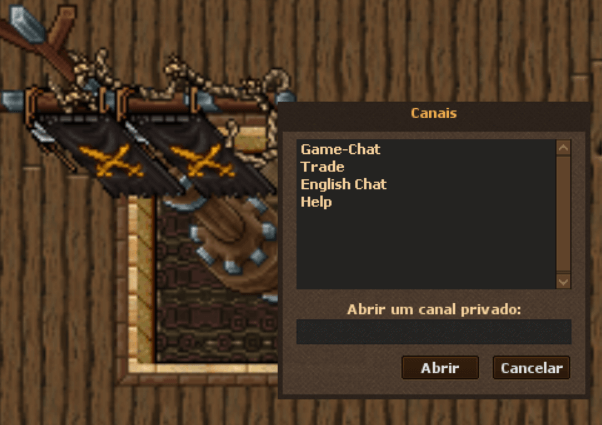
There are several channels for you to talk to other players, to access the channels press CTRL + O on your keyboard.
The basic channels are:
Trade - Used to negotiate with other players
Help - Used to solve your questions
Game-Chat - Used to chat with other players.
The basic channels are:
Trade - Used to negotiate with other players
Help - Used to solve your questions
Game-Chat - Used to chat with other players.
19 - Quest Log
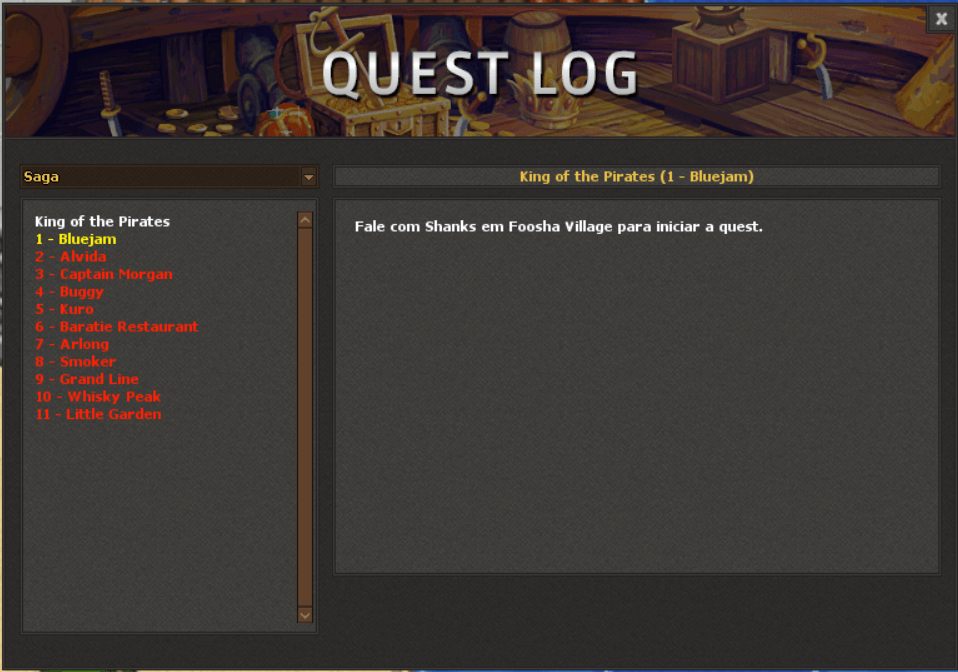
A very important part of otPiece are the sagas and quests. You can view all of your quests log by opening the 'Quest Log' which is located in the upper right corner of your client. The quests that you have not yet started are in red, the ones you are currently doing are yellow, and the ones you completed are green. In some quests you can use the 'Show on map' button to add a mark on your map to show where you should go to carry out the current step. Remember that the mark does not always appear on the same floor of the map that you are on, so you may need to switch floors on the minimap to see it.
20 - Pets

The pets help you collect the items dropped by the monsters and can also take them to your deposit. Each pet has a limited number of items they can collect and a time it takes to take them to the depot. To choose the items that your pet will collect, just open its window by clicking the pet window button in your inventory, click on "Configure" and use the search to find the items you want to collect. You can get a pet in the Postman quest, by buying from the NPC Events Seller or by buying from the game store.
21 - Trade

Trading is a safe way to trade items with other players. In order to trade with someone, press Ctrl, right click the item you wish to trade, choose 'Trade with' and click on the player with whom you wish to trade. A trade window will open where you can whether accept or decline the trade.
22 - Houses
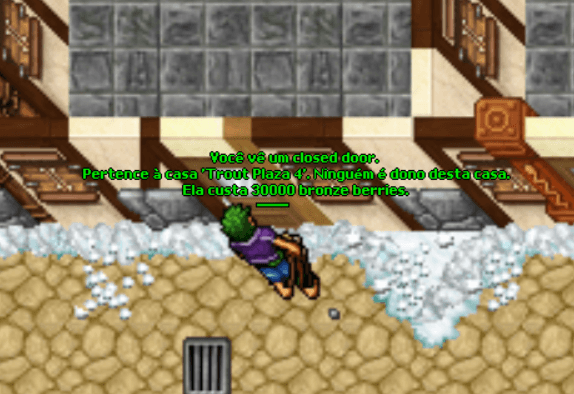
There are houses that can be bought by players, where only the player who owns the house and the ones invited by him are allowed to enter. The items on the house floor or in any part inside the house remain in there, even after a Server Save. To buy a house, you just need to find one available, stand in front of its door and use the command '!buyhouse', only Premium players with level 50 or higher can buy houses.
23 - Enhanced Items
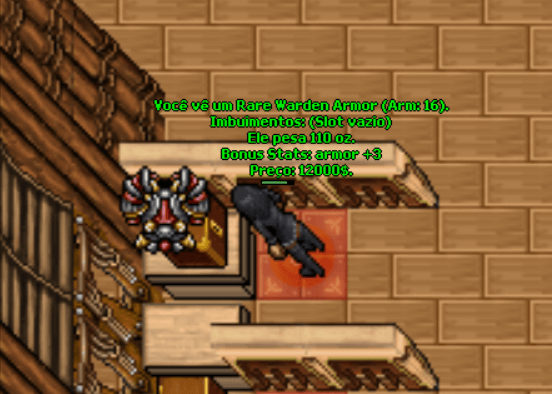
There is a chance to drop enhanced items from any monster in otPiece. These items have extra attributes and have a prefix in their name indicating their rarity level. There are 5 levels of rarity: uncommon, fine, rare, epic and legendary, each being harder to achieve than the previous one.
24 - Imbuement
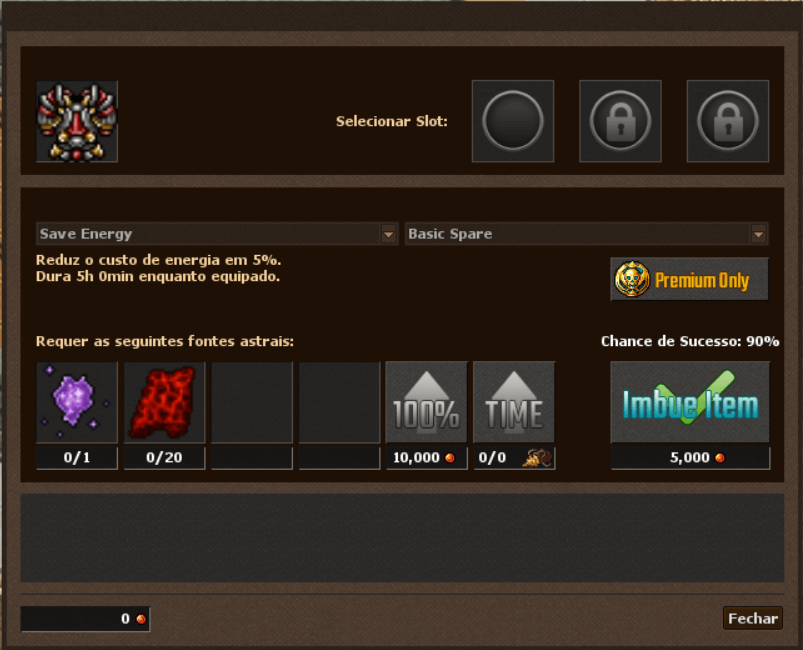
It is possible to imbue items that have empty slots (number of slots shown when using 'look' at the item), giving them special attributes. In order to imbue an item you must first complete the 'The Knowledge to Imbuing' quest and then purchase an Imbuing Shrine from the game shop. Remember that it is only possible to position the Imbuing Shrine inside a house, so you must have your own house or be invited to one.
25 - Upgrade Machine
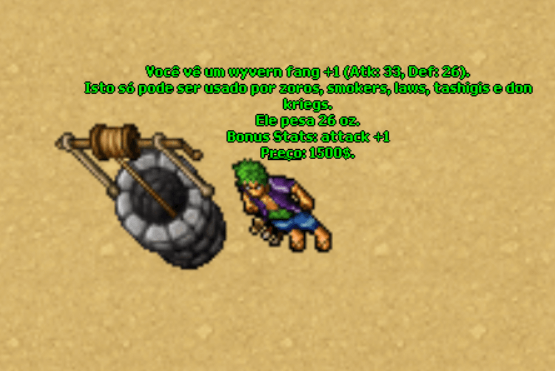
You can improve your equipable items at the Upgrade Machine, giving them the suffix +1, +2, +3... up to +10, and increasing their attack, defense and armor attributes. Upgrading is done through the machine's interface (using the orb directly on the item no longer works): use an Upgrade Machine found around the map or purchase one from the game shop to position inside a house, so you must have your own house or be invited to one.
In the window, select the item to see the success chance, the required orb and the gold cost of the attempt. Each upgrade range requires an orb tier: Upgrade Orb (+1 to +3), Upgrade Orb 2 (+4 and +5), Upgrade Orb 3 (+6 and +7) and Upgrade Orb 4 (+8 to +10). The higher the level, the lower the chance — and if the attempt fails, the item may lose levels. You can pay extra gold to DOUBLE the chance of the attempt and/or to PROTECT the item, gaining a 33% chance of keeping its level on failure.
The machine also lets you FUSE orbs: combine orbs of one tier with gold to create an orb of the next tier, with a 50% success chance. Checking 'Guarantee', the fusion never fails, at the cost of 1 Pirate Coin. Upgrade Orbs can be achieved in quests, dropping from monsters, or made by players of the Blacksmith profession.
In the window, select the item to see the success chance, the required orb and the gold cost of the attempt. Each upgrade range requires an orb tier: Upgrade Orb (+1 to +3), Upgrade Orb 2 (+4 and +5), Upgrade Orb 3 (+6 and +7) and Upgrade Orb 4 (+8 to +10). The higher the level, the lower the chance — and if the attempt fails, the item may lose levels. You can pay extra gold to DOUBLE the chance of the attempt and/or to PROTECT the item, gaining a 33% chance of keeping its level on failure.
The machine also lets you FUSE orbs: combine orbs of one tier with gold to create an orb of the next tier, with a 50% success chance. Checking 'Guarantee', the fusion never fails, at the cost of 1 Pirate Coin. Upgrade Orbs can be achieved in quests, dropping from monsters, or made by players of the Blacksmith profession.
26 - Exercise Dummies
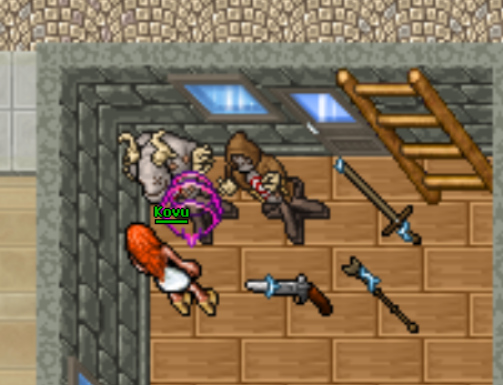
There is a way to train double-speed skills: using the Exercise Dummies that are located in training academies. To train with them, you need to purchase an Exercise Weapon from the NPC Gym or at the game store and consume it to receive a limited number of attack charges. To use your attack charges, simply click to attack the dummy and stay by its side until the charges run out.
In addition to the dummies of the academies it is possible to buy custom dummies in the game store to put in your house. In addition to a custom look, they also allow you to train 10% faster than normal dummies.
All players can use all exercise weapons, without restrictions by type of character, but the result of training respects the characteristics of each character.
In addition to the dummies of the academies it is possible to buy custom dummies in the game store to put in your house. In addition to a custom look, they also allow you to train 10% faster than normal dummies.
All players can use all exercise weapons, without restrictions by type of character, but the result of training respects the characteristics of each character.
27 - Introduction
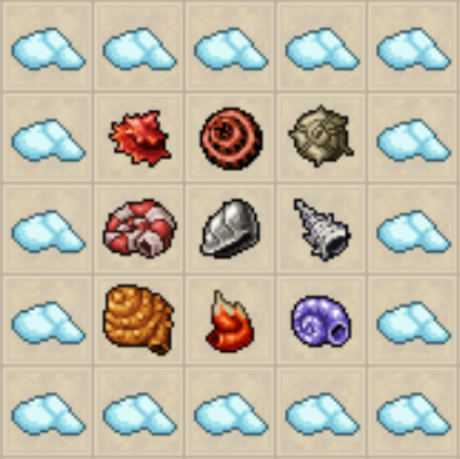
The dials are shells drawn from the sky islands that have mysterious powers and you can get them in exchange for Task Points with NPC Tasker. The dials have charges and can be refilled using Pieces of Heaven. Check out the list of all available dials in this section of the guide.
28 - Breath Dial

This dial has the power to extinguish fields like fire, poison, energy, etc.
29 - Flame Dial

This dial has the power to cause a big fire explosion.
30 - Heat Dial

This dial has the power to set an area on fire.
31 - Milky Dial

This dial has the power to create a cloud wall that blocks the passage of creatures, but does not block skills.
32 - Axe Dial

This dial has the power to deliver 3 ranged attacks on a selected target.
33 - Impact Dial

This dial has the power to attack a selected target with a strong impact.
34 - Reject Dial

This dial has the power to attack a selected target with a strong impact even more powerful than the impact dial.
35 - Jet Dial

This dial has the power to fire a magical attack on a target at a distance.
36 - Iron Dial

This dial has the power to create an iron wall that blocks the passage of creatures and skills.
37 - Introduction
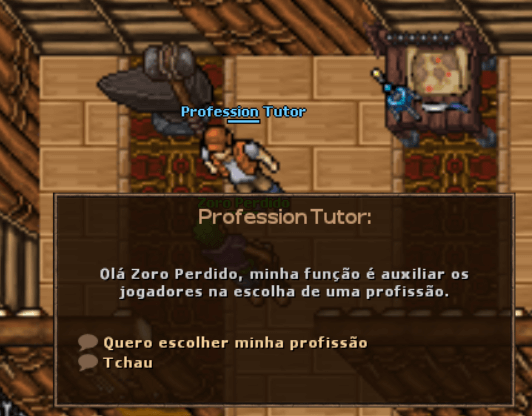
There are three professions in otPiece that give the player different skills and accesses, they are: Blacksmith, Explorer and Cooker. You can choose between Blacksmith and Explorer with the NPC Profession Tutor which is located on Trade Island, and become a Cooker with the NPC Cooking Tutor in Loguetown. Once you have chosen your profession, you will not be able to change your mind.
38 - Blacksmith
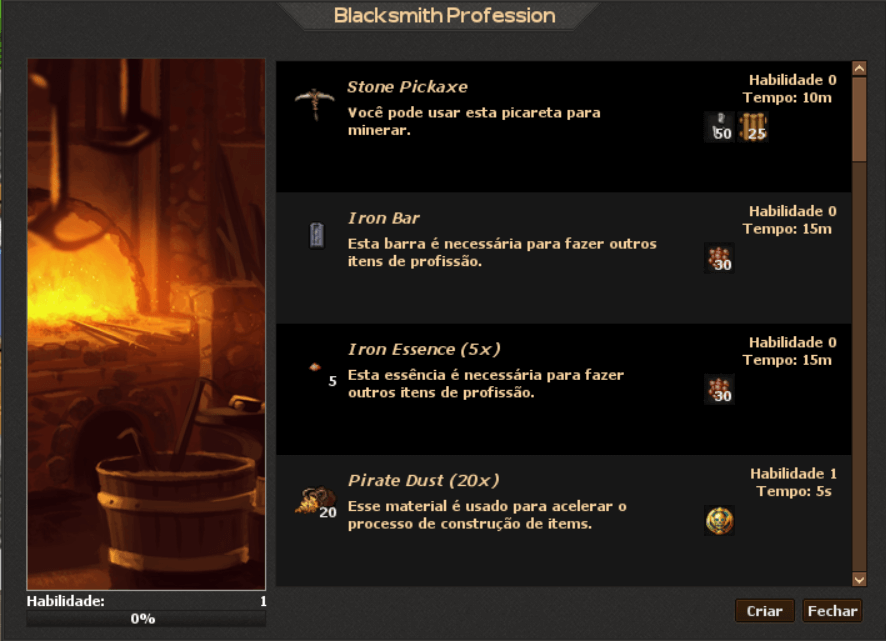
Blacksmiths are masters in mining and manufacturing items such as Upgrade Orbs and Picks, as well as know how to produce items needed for imbuing and even Akuma Keys. To produce their items, blacksmiths need a 'Blacksmith Tools' that can be purchased at the game shop and a house to assemble it. Once you have a 'Blacksmith Tools' positioned inside a house, just right click on it to see all the options of the profession.
Several Blacksmith blueprints — such as Upgrade Orbs, Silver Bar and picks — are learned by buying the blueprint from the NPC Eladon Mastermind; the more advanced blueprints are found inside treasures dug up with the Item Finders.
Several Blacksmith blueprints — such as Upgrade Orbs, Silver Bar and picks — are learned by buying the blueprint from the NPC Eladon Mastermind; the more advanced blueprints are found inside treasures dug up with the Item Finders.
39 - Explorer
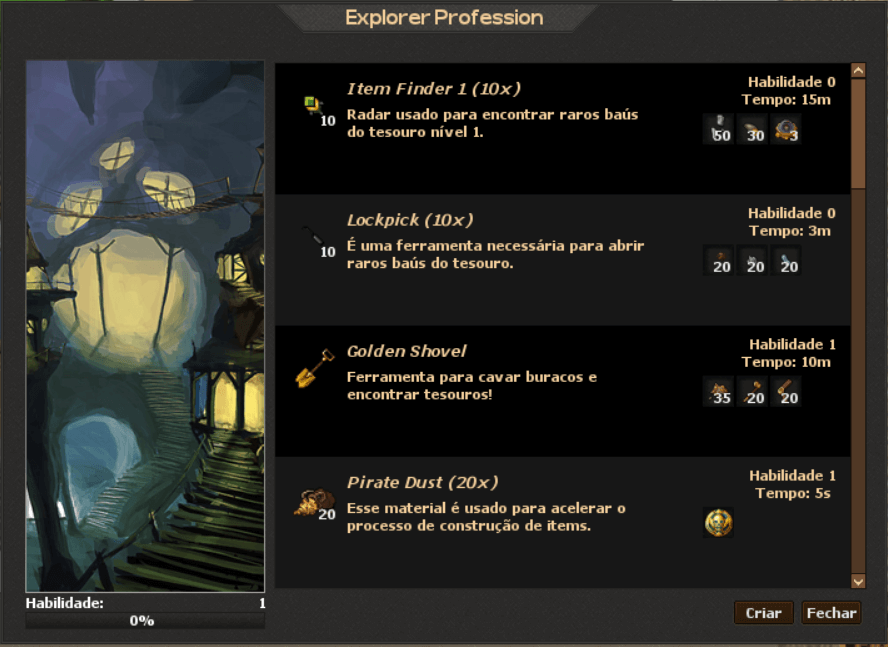
Explorers are adventurous with great experience in finding hidden treasures. They do this with the help of the items they make: Item Finders, Shovels, Bells and Backpacks to store all of this. To craft their items, explorers need an 'Explorer Table' that can be purchased at the game shop and a house to set it up. Once you have an 'Explorer Table' positioned inside a house, just right click on it to see all the options of the profession.
The Explorer's specialty is the Bell line, a progression of five tiers — Bronze, Silver, Golden, Diamond and Jade. By consuming each Bell in order, the character builds up the Divine Bell power, which increases the spawn rate of the creature you are hunting (the higher the tier, the bigger the bonus). To craft each Bell you must learn its blueprint and gather that tier's fragments. Item Finders also come in five levels (1 to 5): the higher the level, the rarer and more valuable the treasures it locates. The Bronze Bell blueprint and the Item Finder 3, 4 and 5 blueprints are sold by the NPC Eladon Mastermind; the Silver, Golden, Diamond and Jade Bell blueprints are found inside treasures dug up with the matching Item Finder (levels 2, 3, 4 and 5).
The Explorer's specialty is the Bell line, a progression of five tiers — Bronze, Silver, Golden, Diamond and Jade. By consuming each Bell in order, the character builds up the Divine Bell power, which increases the spawn rate of the creature you are hunting (the higher the tier, the bigger the bonus). To craft each Bell you must learn its blueprint and gather that tier's fragments. Item Finders also come in five levels (1 to 5): the higher the level, the rarer and more valuable the treasures it locates. The Bronze Bell blueprint and the Item Finder 3, 4 and 5 blueprints are sold by the NPC Eladon Mastermind; the Silver, Golden, Diamond and Jade Bell blueprints are found inside treasures dug up with the matching Item Finder (levels 2, 3, 4 and 5).
40 - Cooker
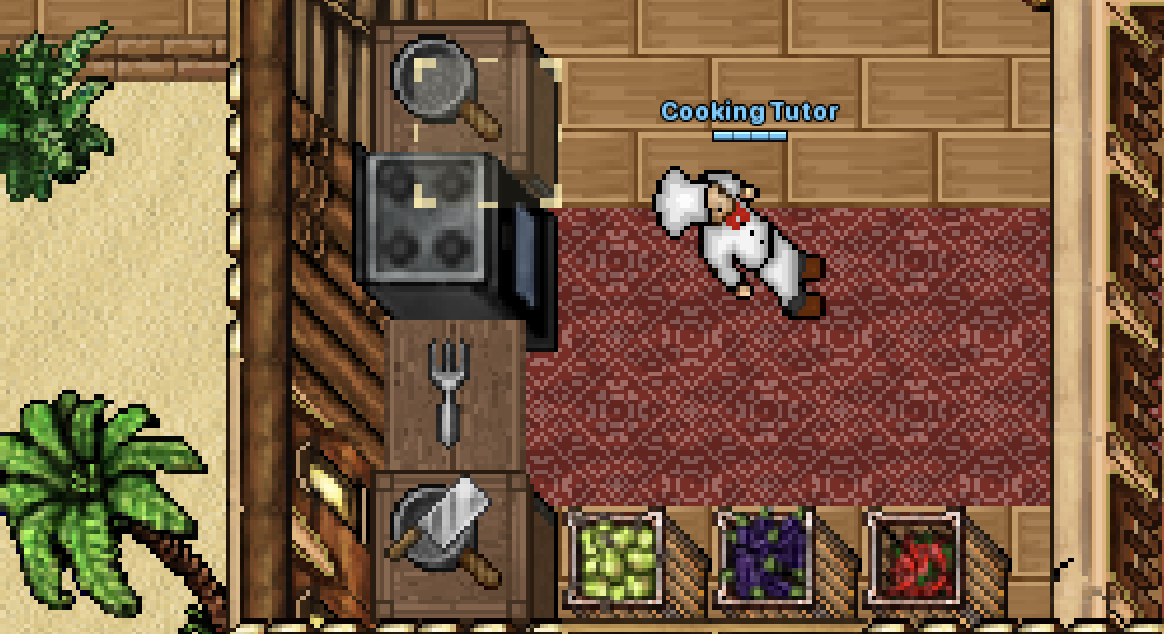
Click a stove to cook: choose the recipe and the amount. Each dish grants a temporary effect and ingredients are sold by the Food NPC. Becoming a Cooker with the NPC Cooking Tutor grants half soul cost, double portions and access to the most elaborate recipes. The 'Black Stove' kit from the shop lets you place a stove in your house.
41 - Character Bazaar
The Character Bazaar lets you buy and sell characters between players, for Pirate Coins. In the game, open it through the scale icon on the upper left corner, next to the Store.
In the Offers tab you see every character for sale, with name search, vocation filter and sorting by price or level. Click an offer to see the full character dossier: status, skills, every item (rare ones highlighted at the top), depot, skins, spells with upgrades and the completed quests and sagas. Hover any item to see its full description.
The system fee is 5% of the price (minimum 1 Pirate Coin), taken from the amount the seller receives. You can also browse the offers here on the website, on the Bazar page — but buying happens only inside the game.
In the Offers tab you see every character for sale, with name search, vocation filter and sorting by price or level. Click an offer to see the full character dossier: status, skills, every item (rare ones highlighted at the top), depot, skins, spells with upgrades and the completed quests and sagas. Hover any item to see its full description.
The system fee is 5% of the price (minimum 1 Pirate Coin), taken from the amount the seller receives. You can also browse the offers here on the website, on the Bazar page — but buying happens only inside the game.
42 - Sell my character
To sell, log in with the character you want to sell and open the "Sell my character" tab. Requirements: be in a protection zone, be level 50 or higher, no skull, no guild, no house, no active Market offers, out of combat, no active buff or transformation and no Pirate Coins in the inventory (deposit or spend them first). The window shows the full checklist in real time.
Set the price (whole number, minimum 10 Pirate Coins) and confirm. You will be DISCONNECTED and the character leaves your character list while the offer is active — it lasts until the character is sold.
When it sells, you receive the price minus the fee as Premium Points on your ACCOUNT: withdraw them as Pirate Coins through the Store's Withdraw button, with any character. Track everything in the "My sales" tab.
Set the price (whole number, minimum 10 Pirate Coins) and confirm. You will be DISCONNECTED and the character leaves your character list while the offer is active — it lasts until the character is sold.
When it sells, you receive the price minus the fee as Premium Points on your ACCOUNT: withdraw them as Pirate Coins through the Store's Withdraw button, with any character. Track everything in the "My sales" tab.
43 - Buy
To buy, carry the Pirate Coins in the inventory of the character you are playing with (the purchase takes the carried coins) and have room for one more character on your account.
Open the offer dossier, review everything calmly and click Buy. Once confirmed, the coins are taken and the character moves to your account IMMEDIATELY: log out and it will be on your character list.
The character comes with everything it owns: equipment, backpacks, depot, bank, skins, spell upgrades, quests and sagas. Frags and skull come reset, and the character is removed from house guest lists. Every purchase is recorded in the Store history.
Open the offer dossier, review everything calmly and click Buy. Once confirmed, the coins are taken and the character moves to your account IMMEDIATELY: log out and it will be on your character list.
The character comes with everything it owns: equipment, backpacks, depot, bank, skins, spell upgrades, quests and sagas. Frags and skull come reset, and the character is removed from house guest lists. Every purchase is recorded in the Store history.
44 - Coliseum
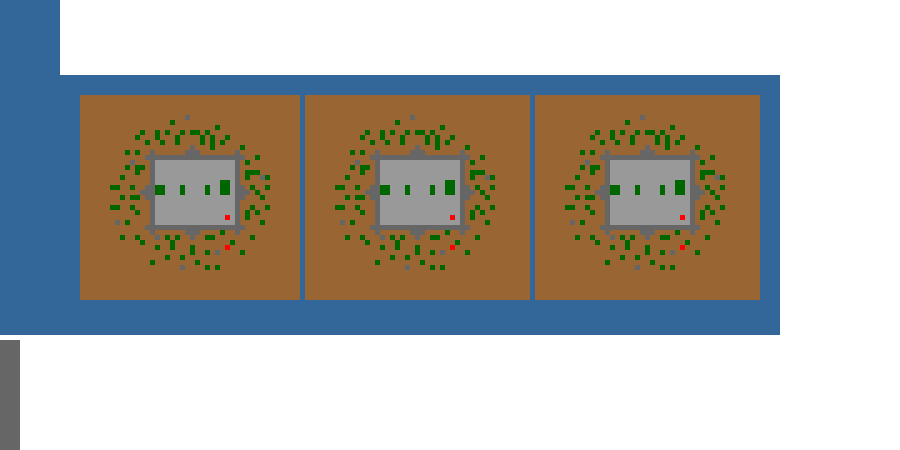
The Coliseum is a survival arena: face 16 waves of increasingly stronger enemies, alone, and get rewarded for how far you go.
To participate, talk to the NPC Guts, at the Trade Center, and say "enter". The entry costs 1 Pirate Coin OR 30,000 berries, requires level 100 or higher and can be done once every 10 hours. There are 3 arenas running at the same time — if all three are occupied, wait for a challenger to finish.
Inside the arena, the next wave spawns as soon as the previous one is eliminated. You have 30 minutes in total. If you fall in battle, you do not really die: you are healed and returned to the hall with the rewards for everything you completed.
To participate, talk to the NPC Guts, at the Trade Center, and say "enter". The entry costs 1 Pirate Coin OR 30,000 berries, requires level 100 or higher and can be done once every 10 hours. There are 3 arenas running at the same time — if all three are occupied, wait for a challenger to finish.
Inside the arena, the next wave spawns as soon as the previous one is eliminated. You have 30 minutes in total. If you fall in battle, you do not really die: you are healed and returned to the hall with the rewards for everything you completed.
45 - Coliseum Rewards
At the end of the challenge — defeated or victorious — you receive 1 Gold Ingot per completed wave. Completing 5 waves or more also grants you 1 point, and each wave above the 10th is worth 1 extra point (clearing all 16 waves yields 7 points).
Points are traded with Guts himself (say "trade"): Upgrade Orb for 10 points and Heavy Old Tome for 35 points. Say "ranking" to see the server's best challengers.
Gold Ingots have a special use: with 10 of them you PERMANENTLY unlock access to the three gold ingot hunts (Gargoyle, Feversleep and Hellflayer — level 250+, premium). The payment is one-time, made automatically when stepping on the entrance of any of them. Gold Ingots also appear in El Drago's reward chest and at the Event Seller.
Points are traded with Guts himself (say "trade"): Upgrade Orb for 10 points and Heavy Old Tome for 35 points. Say "ranking" to see the server's best challengers.
Gold Ingots have a special use: with 10 of them you PERMANENTLY unlock access to the three gold ingot hunts (Gargoyle, Feversleep and Hellflayer — level 250+, premium). The payment is one-time, made automatically when stepping on the entrance of any of them. Gold Ingots also appear in El Drago's reward chest and at the Event Seller.
Link copied!
otPiece.com - One Piece MMORPG